
Want to run A/B tests on your Shopify store? You’ll need to add a small Plerdy tracking code to your website. Don’t worry — this takes only a few minutes and requires no coding skills.
Follow these steps.
Step 1. Copy the A/B Test Code in Plerdy
- Log in to your Plerdy account.
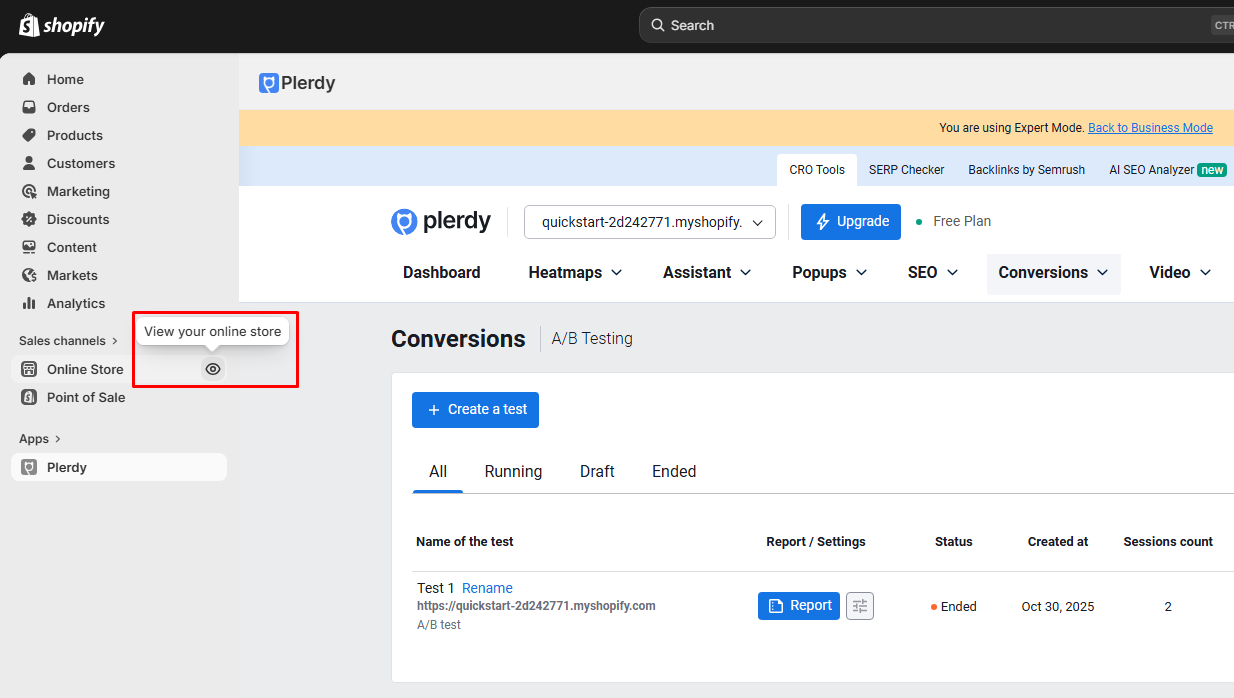
- Go to A/B Testing in the Conversions section.
- Click “Add A/B Code.”
- A pop-up window will appear — copy the A/B testing code shown there.
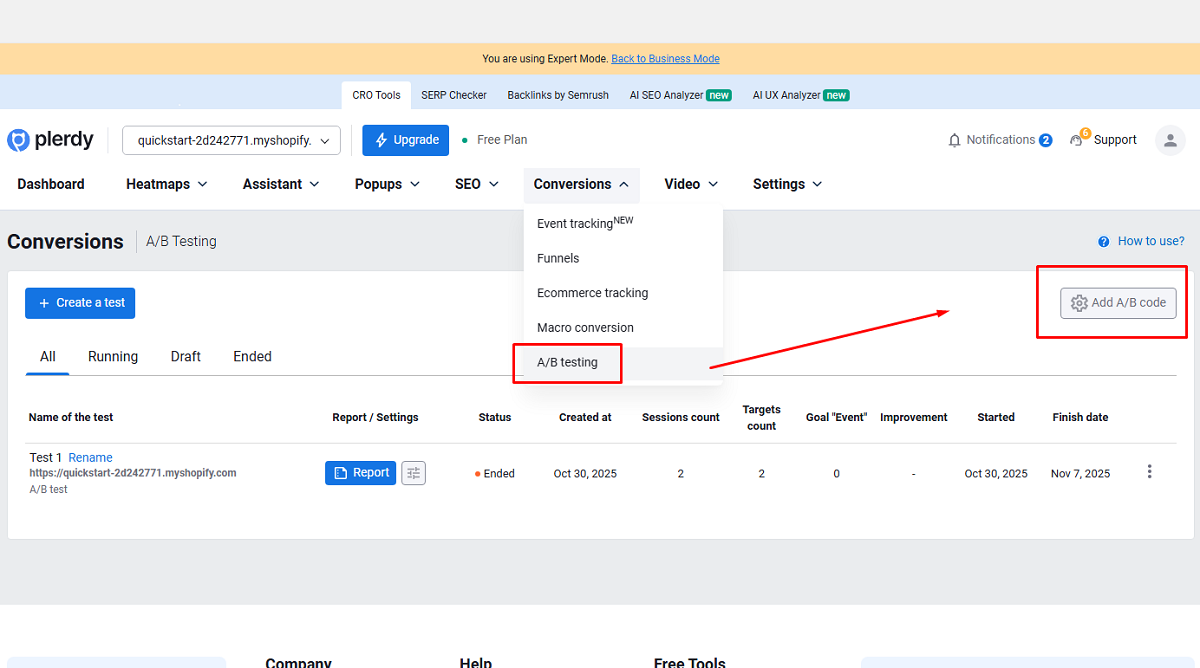
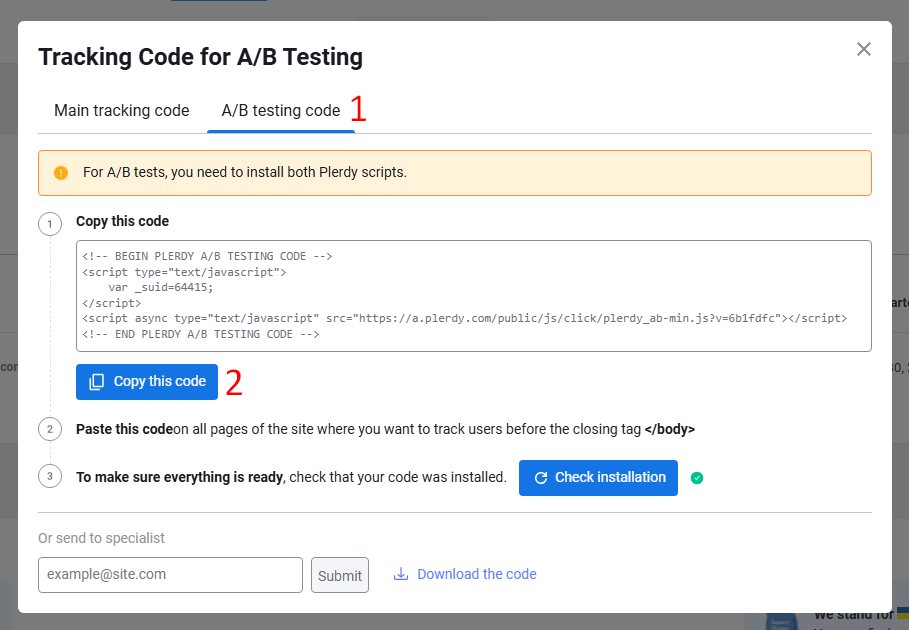
You’ll paste this code into Shopify in the next step.
Step 2. Open Your Shopify Theme Code
- Log in to your Shopify Admin panel.
- In the left menu, go to:
Online Store → Themes - Find your active theme.
- Click the three dots (•••) next to it.
- Choose Edit code.
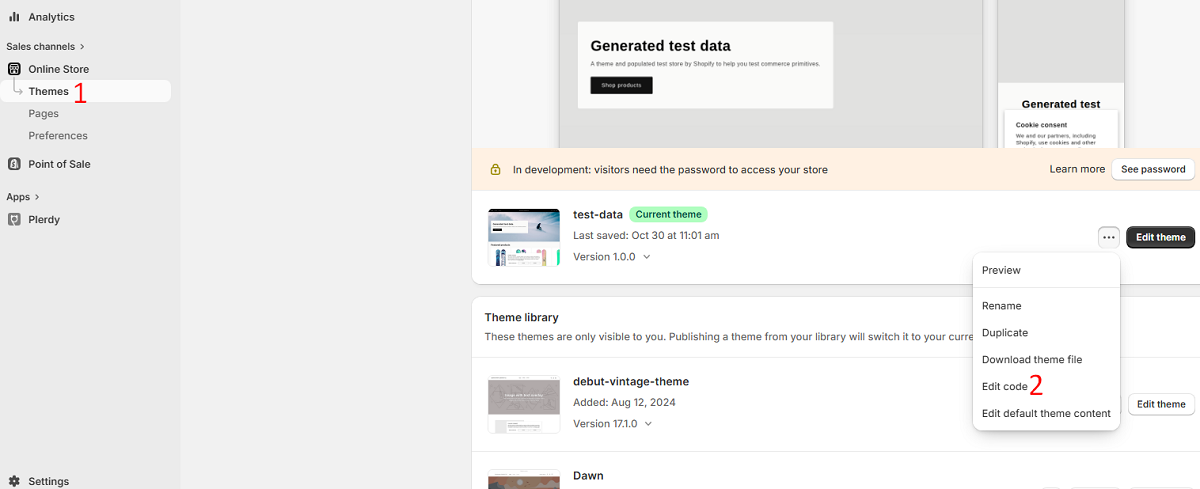
You’re now inside your theme files.
Step 3. Paste the Plerdy Code
Where you add the code depends on where you want A/B testing to work.
Option A — Add the code to ALL pages (recommended)
- In the left file list, open:
Layout → theme.liquid - Scroll down to the bottom of the file.
- Find the closing tag: </body>
- Paste the Plerdy A/B code right BEFORE this tag.
- Click Save (top right corner).
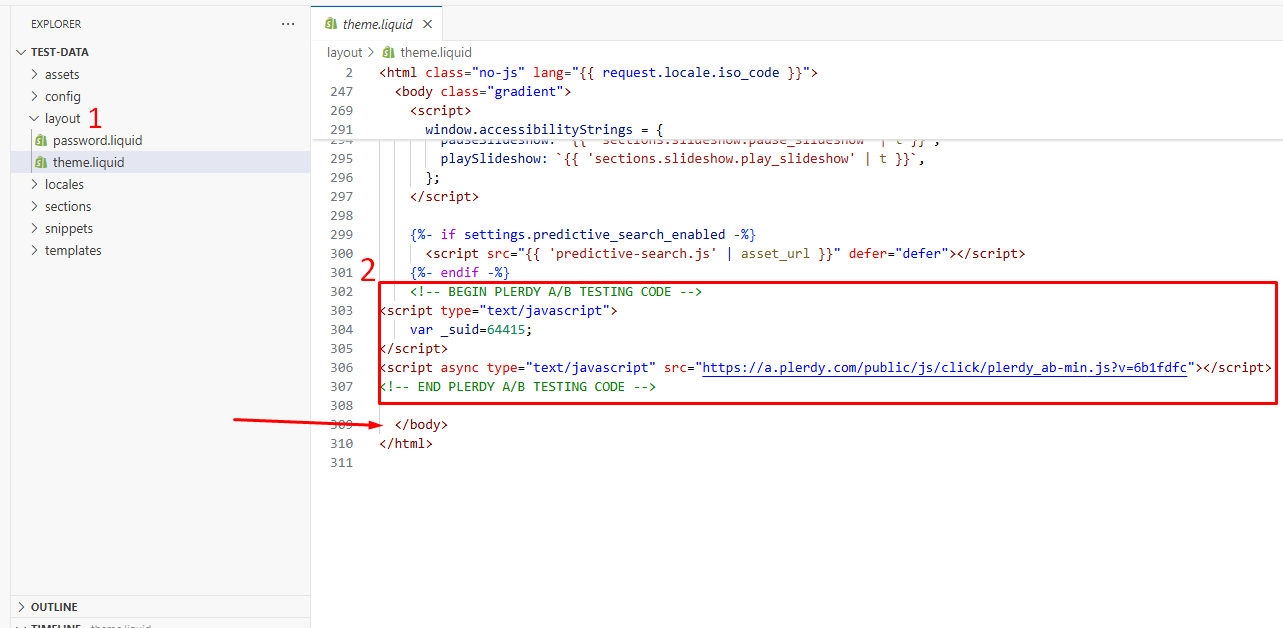
Done! The code is now installed sitewide.
Option B — Add the code only to specific pages
If you want A/B testing only on certain pages, insert the code before </body> inside the relevant template files instead of theme.liquid.
Step 4. Check That the Code Is Installed Correctly
Now let’s make sure everything works.
- Open your website in a new browser tab.
- Go back to Plerdy → A/B Testing (Conversions).
- Click “Add A/B Code.”
- In the window that opens, click “Check installation.”
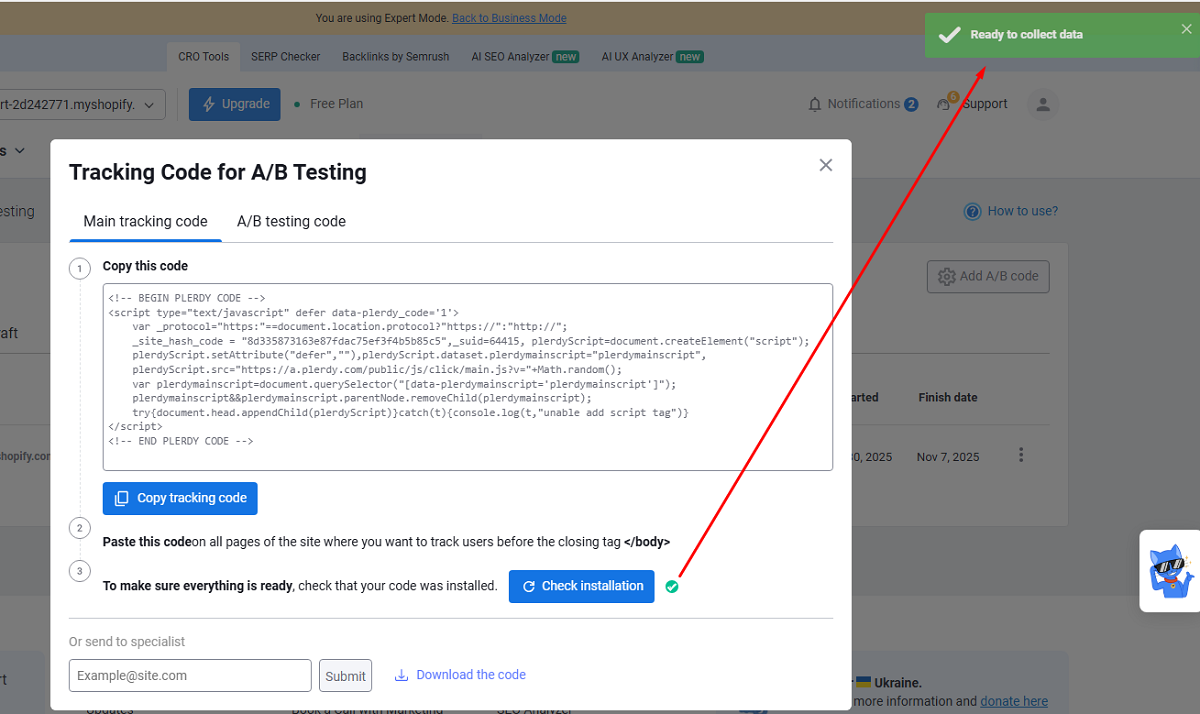
You’ll see a status message confirming whether the code is detected.
That’s It 🎉
Once the status is confirmed, you can start creating A/B tests in Plerdy and improving your Shopify store’s conversion rate based on real user behavior.
Need help choosing what to test first? Product pages, CTA buttons, and checkout elements usually bring the fastest results.