
This guide explains adding the Plerdy tracking code to a WordPress site using the Theme File Editor. It's a straightforward process ideal for those who prefer to work within the WordPress admin panel.
Step 1: Log in to Your WordPress Dashboard
Access your WordPress site by logging in with your administrator credentials.
Step 2: Access Theme File Editor
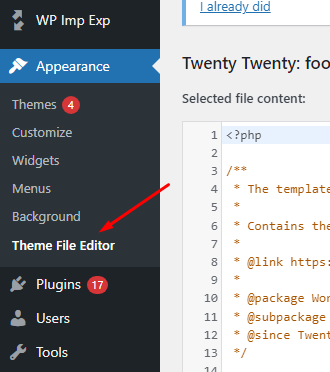
Go to 'Appearance' in the WordPress dashboard and click 'Theme Editor'. This will open the Theme File Editor.
Step 3: Select the Active Theme
Ensure you are editing the currently active theme. You can see this at the top of the Theme File Editor page.
Step 4: Open the Footer File

Find and click on 'footer.php' from the list of theme files. This file controls the footer section of your theme.
Step 5: Backup Your Theme File
Before editing, it's wise to copy the entire content of 'footer.php' and save it in a text file on your computer. This is your backup in case you need to revert changes.
Step 6: Obtain Plerdy Tracking Code
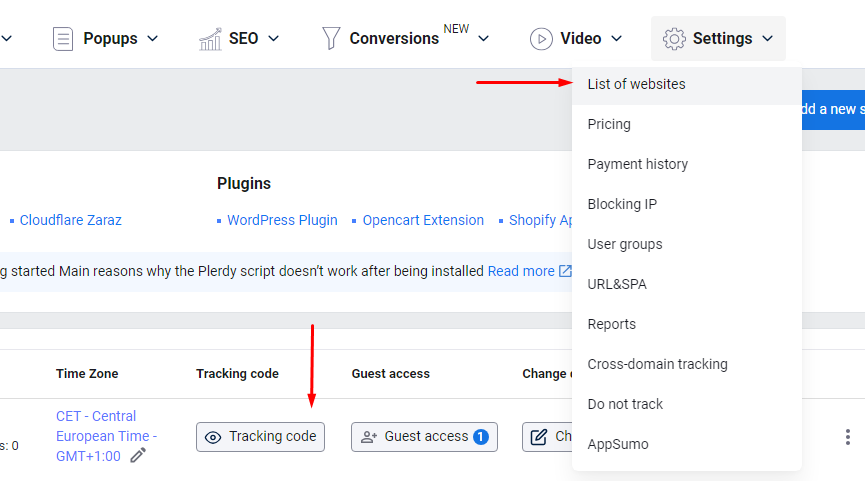
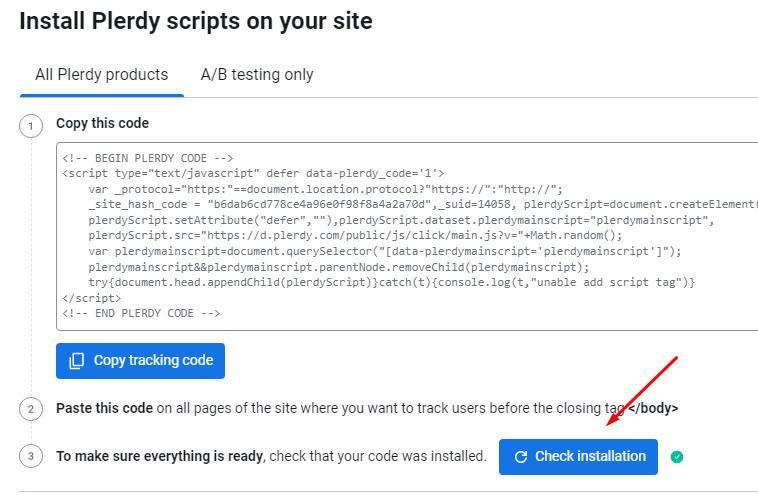
Log into your Plerdy account, go to your dashboard, and copy the tracking code provided.
Step 7: Insert the Tracking Code
Scroll to the end of the 'footer.php' content in the Theme File Editor. Paste the Plerdy tracking code just before the closing '</body>' tag.
Step 8: Update File
Click the 'Update File' button to save your changes. This action applies the tracking code to your website.
Step 9: Verify the Code on Your Site
Open your website in a browser (preferably in incognito mode) and view the page source. Check whether the Plerdy tracking code is near the '</body>' tag.
Step 10: Verify in Plerdy Dashboard
Finally, to confirm the tracking is active, open Chrome in Incognito mode and visit your website. Click on any text on the page multiple times. Then, in your Plerdy dashboard, navigate to Heatmaps > Clicks. Select today's date in the calendar. You should see the clicks you've made. If the clicks are visible, the tracking is working correctly. If no clicks are recorded, revisit the previous steps for any issues or refer to the common reasons below for why data might not be collected.
Conclusion: Troubleshooting Common Issues
If you notice that Plerdy isn't collecting user behavior data, consider the following common issues:
- Incorrect Installation: Ensure the code is placed before the closing '</body>' tag in 'footer.php'. Improper placement can lead to tracking issues.
- Caching: Clear your website's cache after installing the script. Caching plugins or server-side caching might serve an older version of your pages without the new code.
- Conflict with Other Scripts: Other scripts or plugins may sometimes conflict with Plerdy's tracking code. Try disabling other scripts to identify the issue.
- Content Security Policy (CSP): If your site has CSP headers, ensure they don't block the execution of external scripts like Plerdy.
- Incorrect Account Settings: Double-check your Plerdy account settings to ensure they are configured correctly for your website.
- Script Modifications: Avoid modifying the Plerdy tracking code, as any alteration can prevent it from working correctly.
For more detailed troubleshooting, refer to Plerdy's official blog post on why the script might not work after installation.
Remember, modifying theme files can affect your website's functionality. Always backup files before making changes, and consider seeking assistance if you need more confidence editing theme files.