
1. Open Inspect in Your Browser
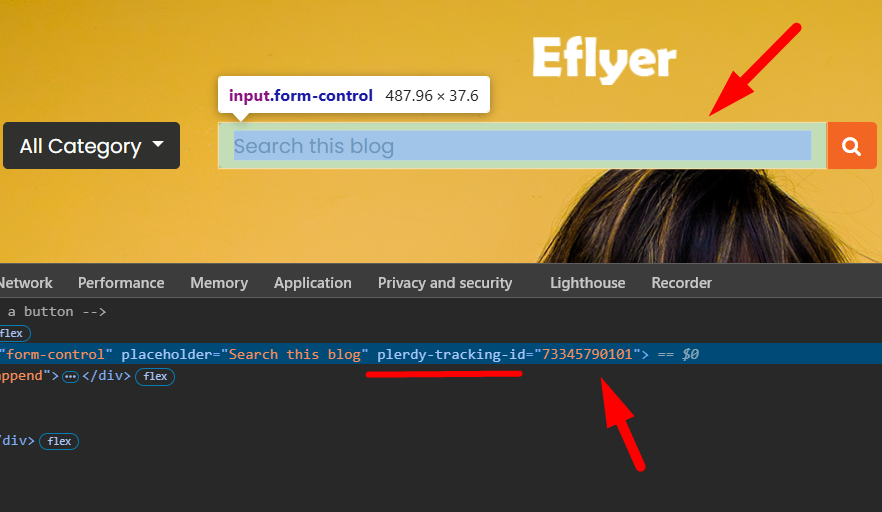
Adding events is now simpler and more precise. To get started, open your website in a browser, right-click on the element you want to track, and select Inspect. Look for an attribute that includes a unique numeric ID, such as:
plerdy-tracking-id="73345790101"
Every element has its own unique plerdy-tracking-id.
2. Copy and Add the Tracking ID
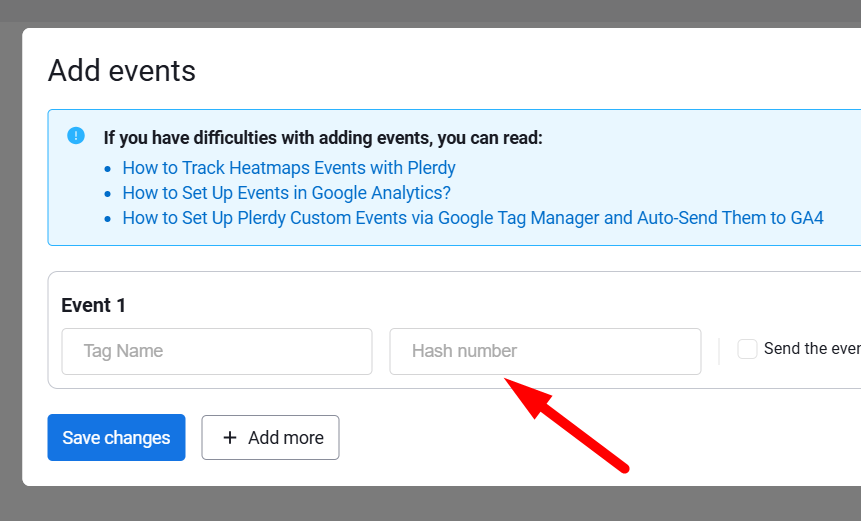
Copy the numeric value from the attribute – for example, 73345790101 – and paste it into the corresponding field in your Plerdy dashboard. Don’t forget to save the changes.
3. View Historical Click Data
Plerdy automatically retains all historical click data. If the element you’re tracking has already received clicks, they will appear in your reports.