
Welcome to our detailed road map for website usability testing! We will walk you through the activities and objectives of usability testing in this post together as well as offer doable advice for running your tests. One essential method that clarifies user interaction with your website and points up areas for development is usability testing. Using heatmaps and video sessions to examine user activity on your website can help you to get important insights and raise your chances of either macro or micro conversions. Let’s dig in and get going; let bad usability not keep you back!
FAQ About Usability Testing
This page will explain what website usability testing is, what phases it requires, and why every owner of a website should be interested in this process. We will also discuss some successful services, some useful tools, and a sample of the usability test report. All of this knowledge will enable you to grasp the process of website usability testing and determine when to involve UX professionals and when to start your own projects.
Often asked questions from UX designers and marketers:
- How can one run a website’s usability test?
- Usability of websites: what is it?
- How should a heading for a usability testing of a website be written?
- How are mobile device website usability tests conducted?
- Which kinds of tests of website usability should I run?
- How can one conduct usability testing for a website prior to being redesigned?
- What should one look at while evaluating website usability?
- List the typical users of websites.
- Utilizing online usability testing, how much could you earn?
Plerdy’s technologies let one examine user activity by means of a website Heatmap and Video Session Recording. Plerdy lets you evaluate the usability of your website, be usability testing or website UX testing, enhance designs, examine calls to action, raise conversion rates, and more.
What is Usability Testing?
A sophisticated assessment of a website depending on its technical element performance and user-friendliness is known as usability testing. Its UI design determines most of its ease of use; its functionality is evaluated during a website audit. Let us investigate the links among these procedures.
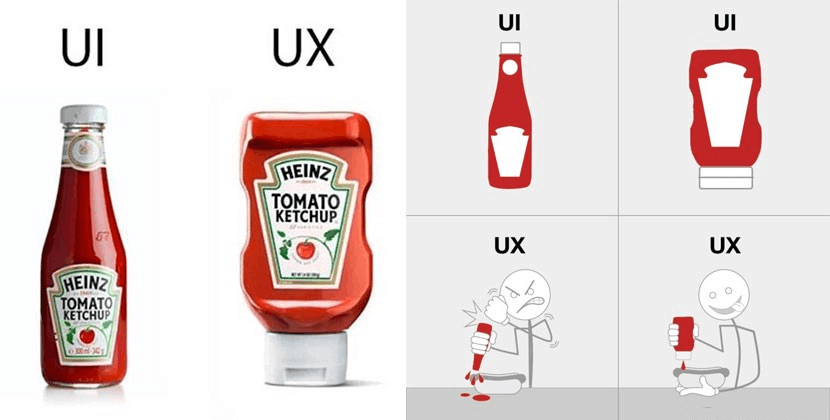
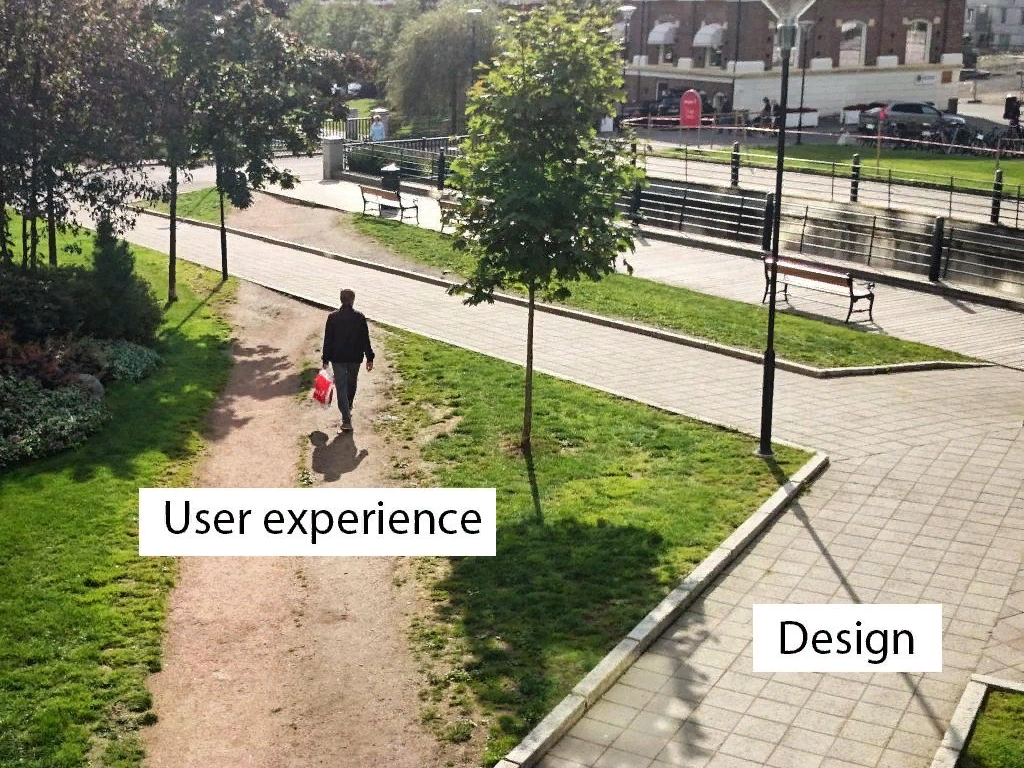
UI design is developing a visual interface or a product prototype perhaps user-convenient. Conversely, usability testing is the approval of the product by the target audience or users expected to be interested in the newly produced good or the launched website. These two examples will help you to better grasp the variations between UI and UX: ketchup bottles and park paved walkways.
The designer says a ketchup container should be small, fit the hand nicely, look good, have a cap and a dispenser. The creator claims that this is the correct UI website design—that of a right product. The UI bottle is then handed to the end user, who believes the design is poor: the bottle is too small and lacks a flip-lid at the bottom; rather, it features a presumably useless dispenser at the top of the bottle. This is realistic evaluation of the usability of the product.
The ketchup bottle example demonstrates the difference between UI & UX:
Let us now examine the case of the paved route. With some trees scattered here and there, an architect has created a park including paved paths for slow Sunday stroll surrounded by a green grass. This is the UI design; the architect depended on their user convenience goal. But as the initiative was carried out, it discovered that park users typically walked straight across the grass to cut their path instead of using one area of the pavement. This was the usability testing, which revealed that the visitors had to develop an extra route for their convenience since the design was not sufficiently usable.
The paved path example illustrates the difference between UI and UX:
A usability audit is a sophisticated technical vulnerability discovery tool for websites. By means of a usability website audit, you will be able to ascertain whether the intended traffic has been attained, whether any issues have developed, and enable the required activities to resolve the situation. For instance, all search engines will instantly find a virus on your website and block it whole. It will thus be filtered as a maybe dangerous resource and some people will not be able to access it. This will cause traffic to decrease as well as sales and other consequent events. A website usability audit will enable you to quickly and effectively solve found issues.
This is a list of the several approaches one might use to investigate user behavior together with the actions one could follow during a thorough website usability audit.
| Ways to analyze user behavior | Website usability audit components |
| Interviews | Technical audit |
| Online surveys | Website content audit |
| Questionnaires | Semantic kernel evaluation |
| Tree testing | Landing page audit |
| Scorecards | Checking web analytics tools |
| A/B testing | Link audit |
| Persona Building | Competitors analysis |
| Click test | Assessment of the internal optimization quality |
| Navigation test | Marketing audit |
| 5-second testing | Development opportunities audit |
| Usability testing | Usability audit |
The point of link between UI design and website audit is usability testing. Usability testing in UI design lets one assess the practicality and convenience (think of the paved walkways and the ketchup bottle examples).
Conversely, a user audit reveals technical flaws in the website and offers solutions to let the UI design to play free. Given the interdependence of the procedures, it would be prudent to do them concurrently as constituents of one intricate check. Other than that, every method has little practical worth since no one requires an awful design non-functional website.
The likelihood is that the website will finally reach its point if it has a simple design, appeals to its users (as indicated in the UX test), and functions as expected based on the usability audit.
Checklist for Usability Testing
Regarding website usability testing, several elements should be taken under account. Fear not, though! The Website Usability Checklist: 210 Points of Testing will help you to guarantee that your website is really user-friendly. While building a website can be challenging, making it useful presents another task. It’s like an endless Jenga game; if you change one element, the entire website may fall apart. From broad guidelines for usability to particular components influencing sales, like the product page and user registration, this checklist addresses all. These are only a handful of the several topics the checklist addresses:
- Certifications and indicators of quality
- Targeting geographies and language choices
- Simple terms and easy design
- Product screening and user registration; purchasing procedure and other factors influencing sales
- Structure of a website and internal linking
- Online store usability study of the basket and content
- The website’s search engine capabilities
This exhaustive checklist will guarantee that your website provides consumers with the greatest experience available and is simple for use. So why wait? Starting your website usability testing now can help you to increase the performance of your website!
Example Usability Testing Website – animalessalvajes.world
I recently got the chance to check the animalessalvajes.world’s usability. When consumers land on the website, a pop-up shows right away—not the greatest practice since customers need time to investigate and grasp the goal of the website. Most consumers closed the pop-up as expected without following the newsletter subscription. Set a wait of at least 10 seconds before displaying the pop-up or employing a scroll-based trigger to solve this.
The menu’s repeated categories caught my attention as well since they could mislead consumers toward poor usability. Having only one menu—probably the one in the upper left corner—is better. At last, the search bar is a necessary component of a website and has to be clear and quickly reachable. The present search bar design could be better to increase its visibility.
About conversions, the subscription form has to be redesigned to appeal more and grab attention. The part dedicated to stores also requires more marketing to inspire consumers to visit and improved names.
The website might benefit generally from some design and usability enhancements. For instance, the usability website might be more user-friendly and get more visitors with simple changes to the pop-ups, menus, and search bar design.
8 Types of Usability Testing Methods
Any website or application’s development starts with usability testing, which is absolutely vital. Still, choosing which strategy to follow can be difficult given the several approaches that are at hand. You have to take various aspects into account—including your resources, target audience, and research goals—before deciding on a testing technique.
Usability testing falls into three main general forms: remote or in-person, moderated or unmoderated, and qualitative or quantitative. These categories guide the eight forms of usability testing techniques, which are described here.
- Moderated testing is conducted under a qualified researcher who presents the test to participants, responds to their questions, and probes further questions. Conversely, unmoderated testing is carried out free from direct direction. Though they are more likely at their homes and/or using their devices, participants could be in a lab.
- Usability Testing Remote vs. In-person: Remote usability testing are conducted via phone or the internet. By comparison, in-person testing occurs under the physical presence of a UX researcher or moderator. Because researchers can see and evaluate face expressions, in-person exams offer additional data points.
- Comparative research methods involve asking consumers which of two alternatives they prefer; exploratory tests are open-ended, assessment research is used to test a user’s happiness with a product.
The several approaches of usability testing are meant to provide responses to particular research topics. The following are few rather common usability assessment techniques:
- Great for comparison studies, lab usability testing takes conducted inside a specifically constructed usability testing facility.
- Guerrilla testing is a means of testing a broad cross-section of people who might not have any experience with a product.
- Phone interviews are cheap and enable quicker data collecting from less effort.
- One excellent approach to receive comments on navigational organization and layout is card sorting.
- Session recordings are a great approach to find main issues with the intended usability of a site.
- Among the online testing tools and platforms are first-click testing, unmoderated card sorting, and 5-second tests.
- Observation tests let researchers view participants’ facial expressions and body language free from moderator intervention.
The kind of information you wish to gather, your budget, and your available time will ultimately determine the usability testing approach you decide upon. Choosing the suitable testing technique will help you to guarantee that your application or website is functional, understandable, and easy for your target market. Tools like Plerdy heatmaps and session replays can give insightful analysis of user interaction with your website, therefore aiding usability testing.
Top 10 Usability Testing Tools
Your website must be user-friendly and easily navigable, hence usability testing is absolutely crucial. Unfortunately, the market features a lot of usability testing instruments. Still, we have included the top 10 tools to guide your choice so you may make a wise one.
- Plerdy provides a CRO and SEO toolkit for usability website analysis to attain highest conversion. In heatmap tools, it is the second easiest to use.
- Beyond conventional statistics, this solution offers an unparalleled insight of the consumer experience.
- Glassbox: Empowering companies to provide consumers smooth digital paths.
- Hotjar is the sixth easiest to use in heatmap tools software with a 4.3 out of 5 rating; the entry-level price is free.
- Smartlook: Designed for speedy response, this solution addresses the “whys” behind your consumers’ activities.
- Utested by more than 210,000 digital marketing customers, Mouseflow provides behavior insights.
- Combining comprehensive product analytics, complete session information, and collaboration tools, FullStory—a trusted digital experience intelligence platform—offers real-time insights that expose opportunities.
- Lucky Orange has over 375,000 websites and relies on usability and conversion rate optimizing technologies.
- This tool automatically calculates customer interaction impact with a 4.7 out of 5 rating.
- UXCam: Designed to help companies better know their customers, this all-in-one mobile app analytics and usability tool
Making sure your website is user-experienced optimally depends on usability tests. Considering how users of your website handle things. Data derived from heat maps or session replay allows you to identify possible issues and simplify user interface of your website. Recall that a low usability score lowers your possibilities of micro or macro conversions; so, it is imperative to make the appropriate tool investments to improve the usability of your website.
Why Usability Testing Is Important
A user’s evaluation of a website’s design and usability takes up to three seconds when visiting the first time. Should all be good, the visitor spends the following ten seconds learning the structure, navigation, and content of the website. Imagine no issues and everything is clear. In such situation, the user would most likely review the recommended material and take the required action: call the office, subscribe to updates, purchase the given item or use the service. First-time guests will most likely close the website without considering what is offered, though, if they run into a difficulty in the first 15 seconds. The same will happen if the user chooses to remain on the page but finds something confusing or disappointing; the website will lose its relevance.
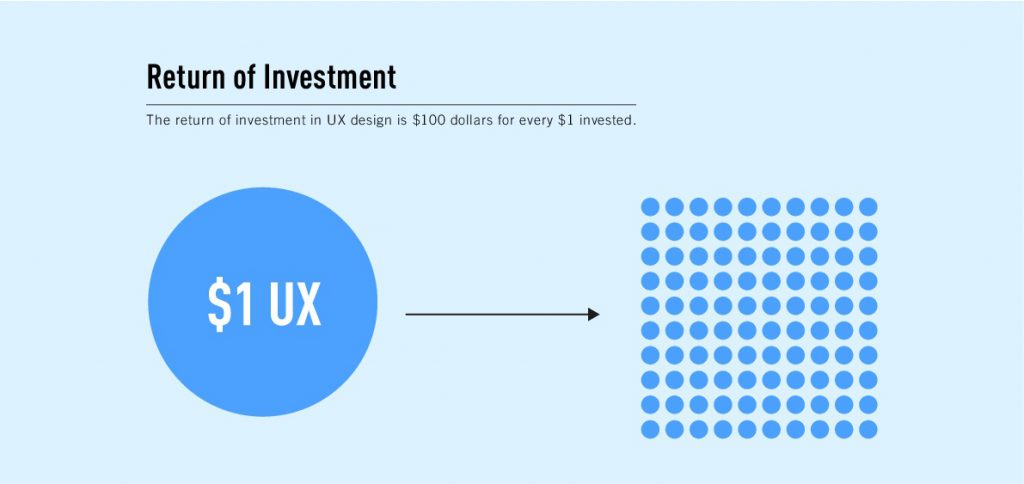
According to the chart, investing $1 on UX (usability) testing returns $100.
Imagine that you have put a pop-up window urging the guests to enter their phone numbers and get a callback from the management to help you better appreciate the goal of usability testing.
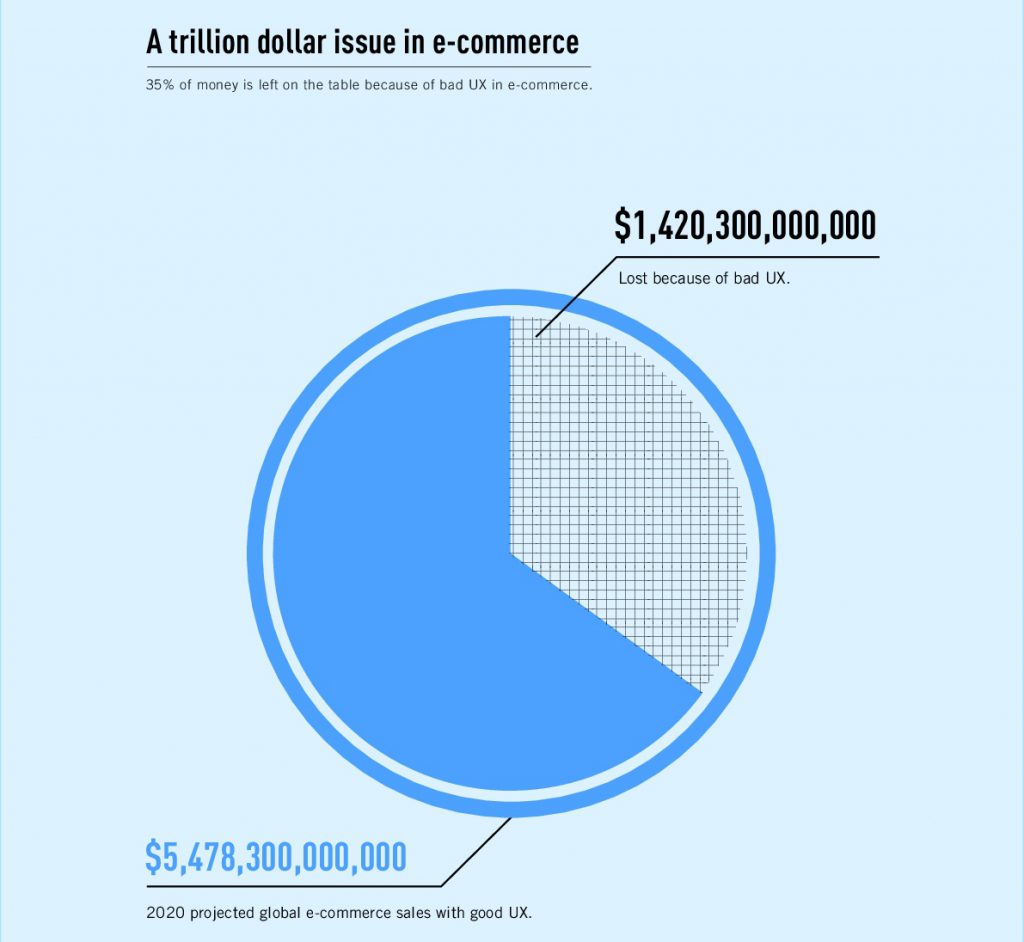
Trillions of dollars flow through the e-commerce industry these days, and without appropriate UX testing, 35% of this money will be lost. Assume you choose to promote your good at the expense of UX evaluation and UI audit. In this situation, increasing the marketing budget will cause more visitors to the website. Most people will be directed to your rivals by the annoying pop-up window since they understand the need of usability testing and created user-friendly websites. Though the higher marketing expenses may result in financial losses, your website will miss its goal nevertheless.
UX testing so enables one to address the underlying problems influencing conversion rates. This is the major reason you should do timely usability tests and fix design flaws on your website.
UX testing lets one launch websites two times faster and considerably simplifies the process of building websites.
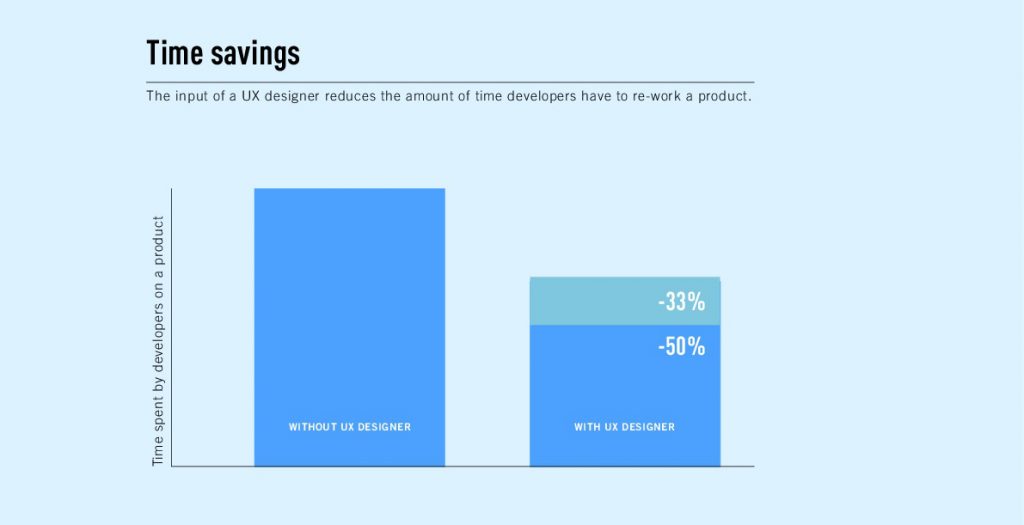
Furthermore benefiting usability testing include increased sales, reanimation of malfunctioning e-startups, and time saving for website developers. Thus, usability testing presents a fantastic chance to revitalize shelved initiatives.
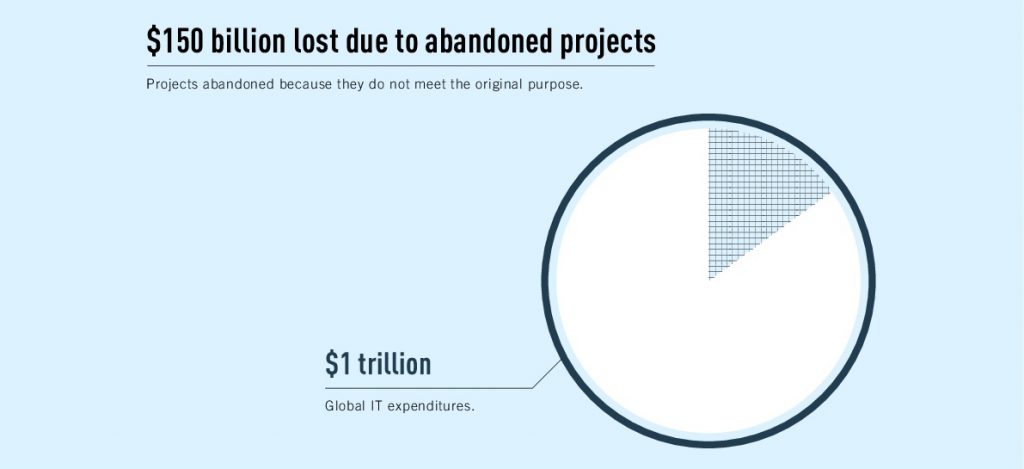
Online businesses’ launch consumes every year up to $1 trillion. Sadly, though, abandoned initiatives cost around $150 billion. The good news is that timely usability testing usually helps most of the dying startups to be reanimated.
Losses suffered by internet retailers brought on by inadequate usability testing.
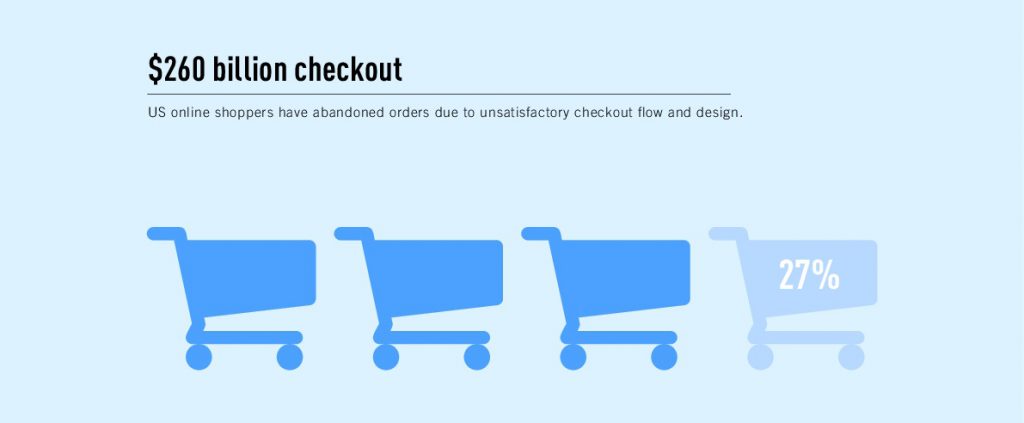
Un satisfying checkout flow and design causes a startling 27% of US online buyers to drop their orders. Translated into financial terms, bad UX causes American internet stores to lose $260 billion annually.
Similar issues afflict other nations as well.
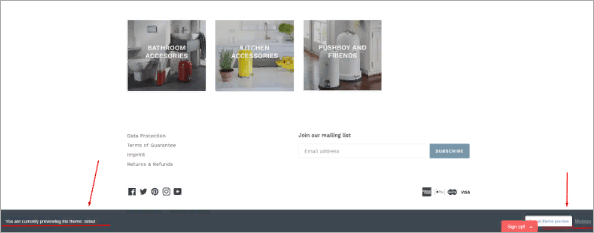
How to Test Website Usability: A Complete Case Study
We have chosen to show how usability testing should be conducted in the actual world. We will examine one of the e-commerce stores, Wesco-shop.us, and offer suggestions for enhancements of its website. UX testing and SEO will be helpful whether your intended launch of a Google Ads campaign is redesign of your website or promotion utilizing SEO. We shall discuss in one of the forthcoming parts how one may evaluate the usability of a website on their own. There is a lot of educational material available on several usability testing websites. For your convenience, though, we have developed the main pointers for a good website usability survey below. If you are really strapped for time, though, think about assigning this work to experts.
Tip #1 Make sure items are categorized properly
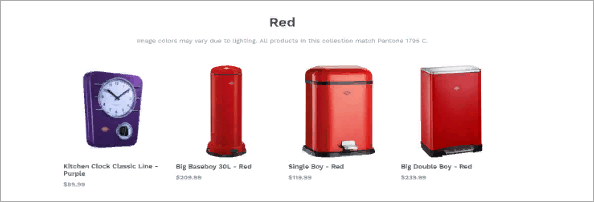
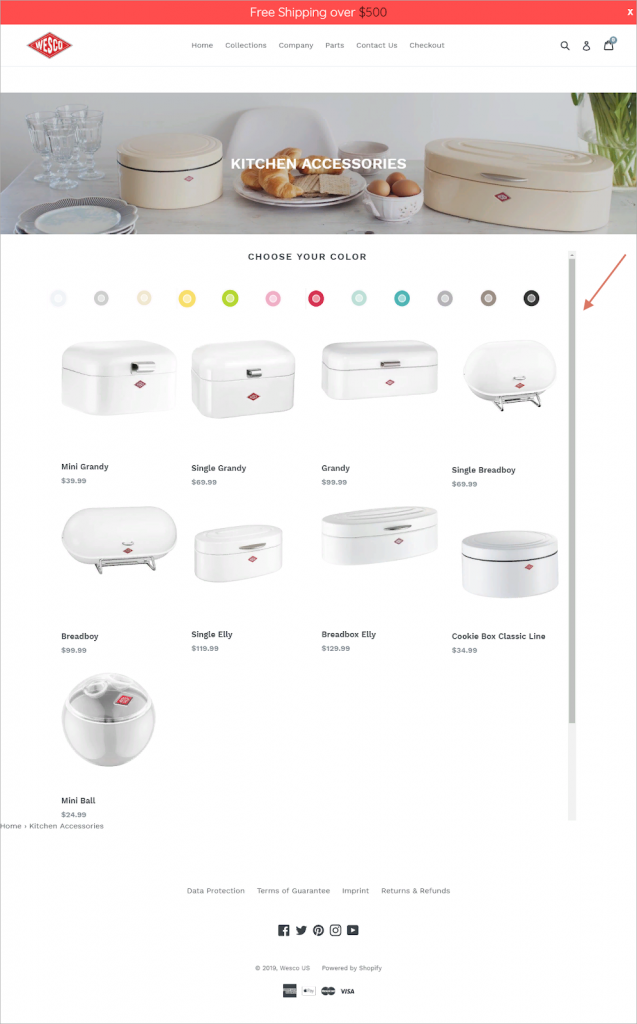
Products featured on a page occasionally feature varying hues. This draws the user’s attention away and gives the page an untidy appearance. If all products are arranged based on color, the website will seem tidy and fashionable.
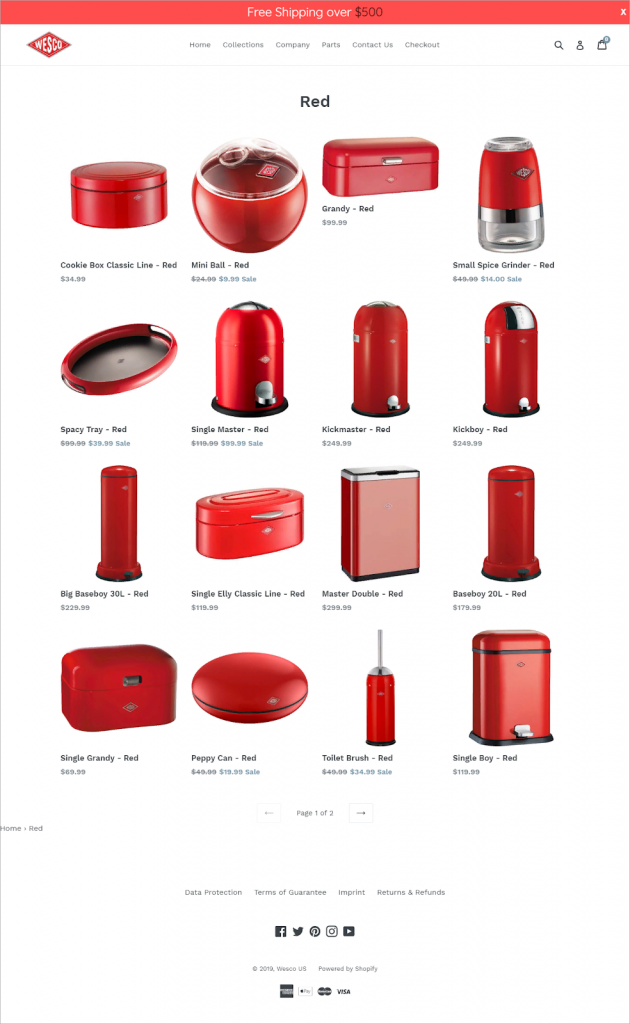
For instance, among the other objects on the page, a purple clock catches out. Change the purple kitchen clock for a red one if the page seems to be organized. If the usability website lacked decorative elements, the colors would only be of little importance. Make sure this criterion is observed since the design concept suggests that the products should be arranged according to their hues.
The client followed advice and just covered the page with red objects. The page now seems neat and carefully considered. The client could call a usability designer to make sure the same color shade is used all around the catalog in order to increase this impact.
Tip #2 A scrolling problem
The page should have its inner scrollbar eliminated. This is so because proper design of the scrollbar is essential. Editing the flawed code will help the page seem better and remove the scrollbar.
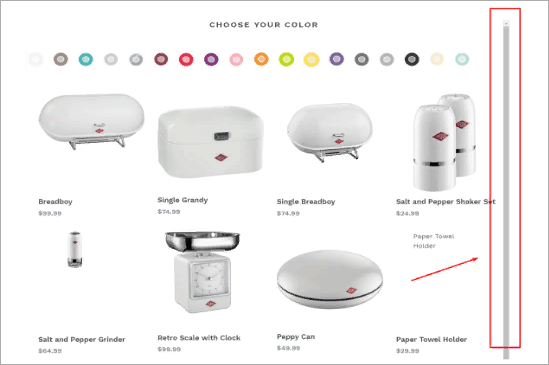
For this instance, the scrollbar is positioned too far from the right edge and is excessively thick.
Furthermore, its hue corresponds with the objects on the list. This throws the observer off-target and makes navigating the page challenging. Eliminating the scrollbar will help to simplify the page.
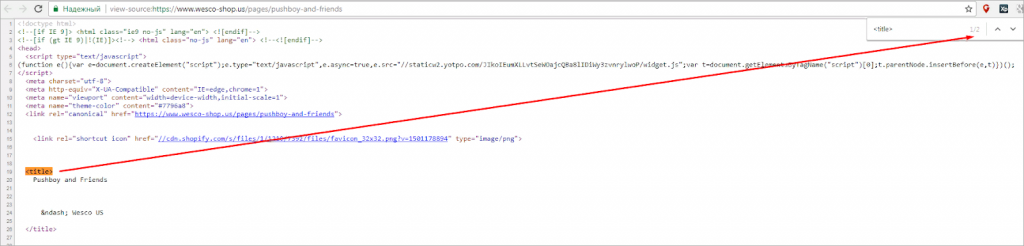
Our job is to examine the code, locate the issue, grab a screenshot, and underline the area that requires change. Tell the client then about the usability issue and send the screenshot.
The client neglected the scrollbar issue for some unidentified cause. Still there remains the broad grey line, which keeps the users from looking over the catalog. We cannot personally change the code since we do not have access to the rear-end of the website. Let’s keep our investigation expecting the owner of the website will solve this issue with usability.
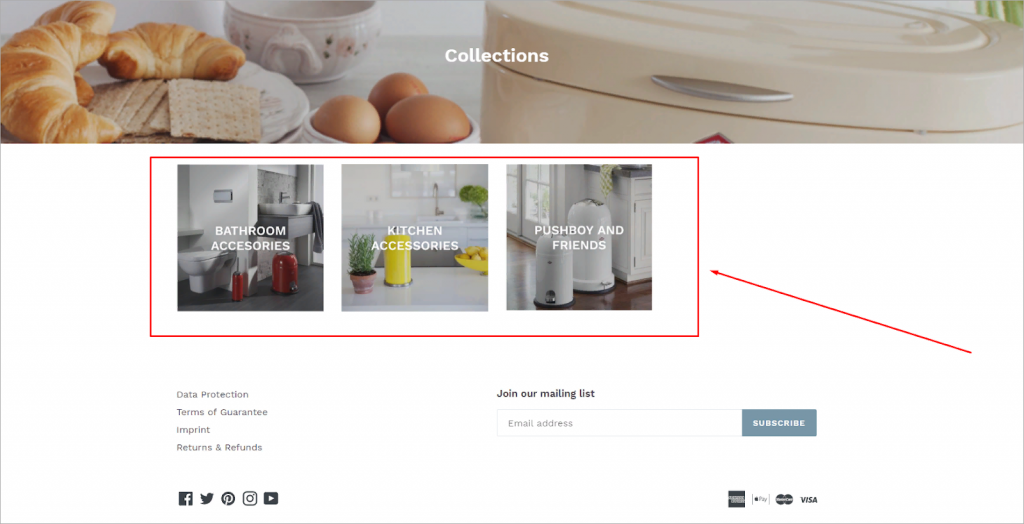
Tip #3 A mistake in the footer’s layout
Sometimes when refreshing the landing page the user may find a website footer error: a free field with a search bar shows at the bottom but is not present. One should correct the code to restore the previous website layout in order to solve this usability issue.
The page ought to have some room at the bottom. Steer clear of including components other than connections to social networking and payment systems, “Sign Up,” “Back to the top,” buttons.
Sadly, the owner of the website chose not to change the code in line with our advise. The grey box so still occasionally shows at the bottom of the page obscuring payment system logos. Most users will also find the non-functioning search bar there annoying.
Tip #4 Make sure the design elements are properly aligned
Not fitting the overall website layout, three content blocks with categories moved to the left. Go back end and properly center them to solve this issue. That is simple as it is.
Still, the client should confirm the rubric twice. The three little content blocks seem really strange even with center. Thus, let us create a new category, employ larger photographs, and once more center all the pieces. Looks quite nice in terms of usability.
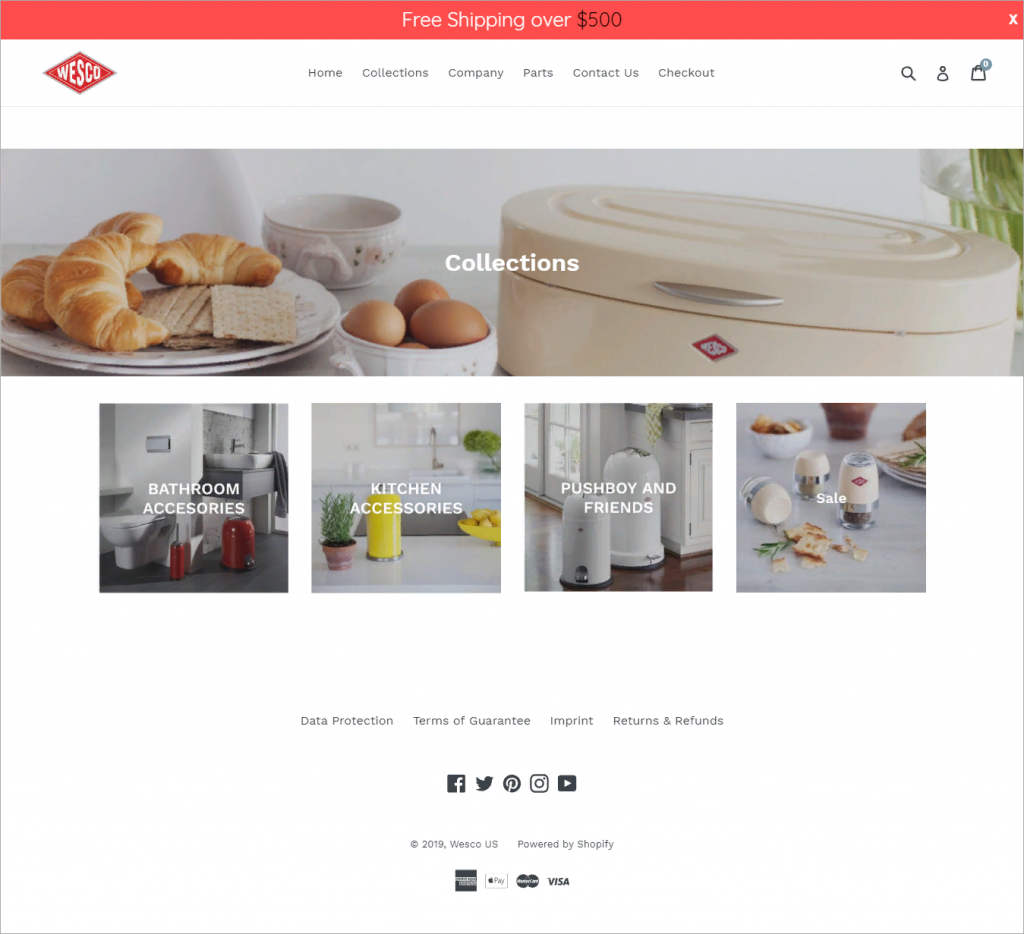
The owner of the website followed our advice and started the required revisions right away. Four content blocks are now orderly under the main picture. Should the store have future additional product categories, they can be included as independent blocks stacked on top of one another. Such a design will seem pleasing and be easy to use.
Tip #5 Size all elements optimally
Resize and center the comments box. It seems overly large and cumbersome right now.
Although the comment box went smaller, the owner of the website partially considered our advice: it fits the page’s width. In this situation, the user would probably find it difficult to create long comments with a thorough account of whatever problem they could have come across.
Tip #6 Inadequate image layout
Every image from every block should have the same scale. Should this need not be met, the website will appear disorganized and shabby. Lack of consumer loyalty, lower sales, and other issues can follow from this as well.

Show the client the screenshot of the image that jumps out from the others and explain the need of swiftly solving the issue.
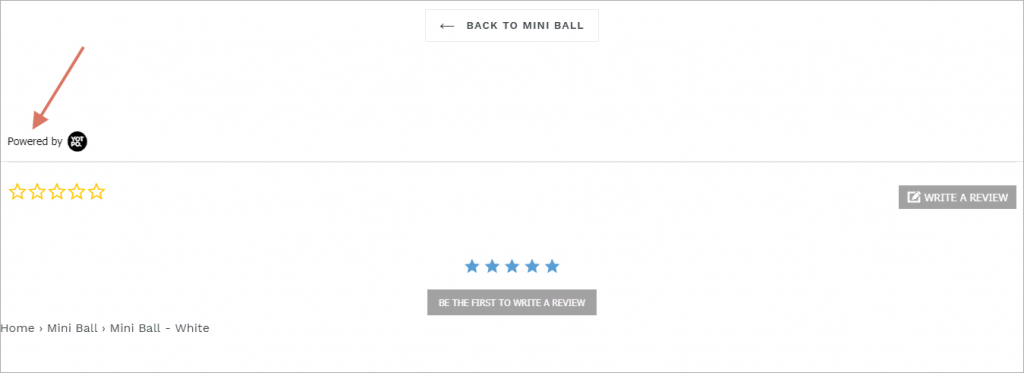
Tip #7 Delete unnecessary links
The feedback form has the “Powered by YOTPO” link, a particular service meant to help with client comments. Still, if the link stays there, a lot of the traffic will be diverted from the website. We thus refrained from subscription to that.

Unspoken rules state that every component of a website for an online store should make purchase easier for the user. Thus, it should be hidden or eliminated if something could divert the consumer from exploring the products and going to the checkout. Otherwise, the declining conversion rates are unavoidable.
In this sense, quality UX depends on tremendous attention to detail; nonetheless, even more crucial is correctly implementing those details. Regretfully, nevertheless, this usability case study shows how many crucial aspects are neglected.
How To Do Usability Testing
Stage 1
First, the formulation of the objectives, hypotheses, and quick usability testing chores is absolutely vital Second, usability testing is a deep study process, so it is wise to do it under specific conditions.
Should UX testing be preventive, its objectives, hypotheses, and activities center on verifying if the website performs as expected and whether every component is shown correctly. In this situation, limited changes will be done since most possibly encountered issues will just require little corrections. Conversely, should the website produce unexpected findings, the objectives, assumptions, and responsibilities of UX testing should be taken under distinct consideration. The difficulty to be solved during usability testing defines the aim. While the chores assist create the plan to address the problem, hypotheses help identify the likely root cause of it.
| The goal of UX testing | Hypotheses | Tasks |
| Detect the root cause of the 50% drop in sales and understand why the well-thought-out promotion strategy has yielded a negative result | 1. Technical problems.
2. Mistakes in SEO optimization 3. Inadequate advertising 4. Low-quality content 5. Deliberate actions of the competitors |
1. Conduct the technical audit and define the possible cause of the malfunction.
2. Double-check the semantic kernel and keywords. 3. Contact the advertiser and double-check the message of the published ads. 4. Analyze the block report and assess the quality of the published articles. 5. Check YouTube channels and forums for negative feedback or criticism. |
Stage 2
Following the initial testing of the developed hypotheses, we have deduced three non-detectable problems, one clear error, and one hypothesis that is still dubious.
Third Stage
| Issues that have not been detected | The existing problem | The hypothesis needs further testing |
| Deliberate acts of the competitors. This hypothesis was not proved because the UX-testing tools have allowed for quick analysis of the popular resources for any negative action undertaken by a third party. Unfortunately, no such information was provided. | Low-quality content. The website’s content is divided into three sections: ‘ Blog,’ ‘Product cards, ‘ ‘ News.’
Most ‘Product cards’ lack product descriptions, images, or videos. Instead, there is a list of characteristics to advertise the product. The ‘Blog’ section contains very few posts. Besides, each article published in this section abounds in mistakes and could be more informative to the reader. Finally, the ‘News” section provides only some basic information about the company, which is very generic and boring. |
Technical issues. On some gadgets, the page download time has increased, and the layout differs from the original one. Apart from that, some videos cannot be played on tablets and smartphones. |
| Inadequate advertising settings. The advertisers provided their feedback and confirmed that the ads were appropriate. | ||
| Incorrect SEO-optimization. SEO professionals have checked the inquiries that have brought the website to Google’s Top-3. All procedures were carried out properly, and relevant keywords were used for website promotion. |
Stage 3
Let us list the most often used techniques and investigate how they fit our hypotheses.
- Corridor testing consists on a group of people alternately testing the functionality of a website or product. By means of a user test program, the moderator—who arranges the test—notes the procedure. Once the work is finished, user behavior is examined and the outcomes help to enhance the user experience.
- Remote moderated usability testing is the process of gathering the required data by the moderator personally contacting the target audience—that is, respondents—via Skype, phone, or another communication channel. Moreover, the recorded interviews serve to improve usability.
- Remote unmoderated usability testing is the process of using particular testing tools under the direction of the moderator free from involvement. The moderators note the issues and use these reports to improve the usability of the website once the work is done.
- A/B testing means producing numerous iterations of the same product, in which case the user is asked to select one.
- Expert review calls for the participation of an expert capable of identifying issues without consulting the target audience. For instance, if you have to evaluate a website for an online furniture business, consult a seasoned furniture seller who can point out some subtleties enhancing the website conversion rate.
Remote unmoderated testing seems to be the best approach to investigate the “poor content” theory. Simultaneously, identifying potential technical problems will be assigned to professionals who will offer an expert analysis. The testing technique you use mostly depends on the hypothesis; so, you should choose the most pertinent one for any situation.
Still, the usability test report is only valuable if the suggestions are carried out methodically.
Nota Bene
You now have it, people! One of the most important methods to greatly enhance the metrics of your brand is website usability testing since it helps to find flaws and problems fast. Integration of GA4 and other cutting-edge tools has made this procedure even more automated and effective. Though these tools are helpful, there is no replacement for having someone visit your website and examine and report their experiences. And Plerdy helps with that. Plerdy lets you try it for free and gather UX data to document tests and find normally overlooked problems using its free walkthrough and drawing tools. Therefore, don’t hesitate to seek comments and experiment with new approaches to raise the usability of your website; this might make all the difference between success and failure.